A step-by-step look at acoustics, signal flow, mic selection, and monitoring for professional results
There is a noticeable difference between a podcast that sounds homemade and one that feels polished and professional. Listeners may not always know why one sounds better than another, but they can hear the difference immediately. Clean vocals, balanced tone, and consistent levels create trust and credibility.
Building a broadcast-quality podcast studio from the ground up is not about buying the most expensive gear. It is about thoughtful design. When acoustics, signal flow, microphone choice, and monitoring are planned correctly, the result is smooth, professional sound that holds up across every listening platform.
Here is what it takes to build a studio the right way.
Step 1: Start with the Room
Before choosing microphones or mixers, focus on the space itself. The room plays a major role in how your podcast will sound.
Choosing the Right Location
Select a space that is naturally quiet and removed from outside noise. Traffic, HVAC systems, and hallway activity can quickly become distractions in a recording.
Room size and shape matter as well. A room that is too reflective will create echo and harshness. A perfectly square room can create low frequency buildup that muddies voices. When designing from the ground up, consider ceiling height, wall materials, flooring, and even furniture placement.
A good space gives you a strong foundation before any equipment is installed.
Acoustic Treatment for Voice Clarity
Podcasting is centered around speech. Clear, intelligible vocals are the goal.
Hard surfaces reflect sound. Those reflections cause reverb and make dialogue feel distant. Acoustic treatment helps control those reflections and keeps voices focused and present.
Most podcast studios benefit from:
- Absorption panels on walls to reduce mid and high frequency reflections
- Bass traps in corners to manage low frequency buildup
- Strategic placement of soft materials to create balance
The objective is not to remove all life from the room. It is to create a controlled environment where voices sound natural and clean.
Step 2: Build a Clean Signal Path
Once the room is under control, it is time to think about how audio travels from the microphone to the final recording.
Microphone to Interface
Professional studios typically rely on XLR microphones connected to dedicated audio interfaces or mixers. Balanced connections reduce electrical noise and provide stable, reliable performance.
Proper gain staging is critical. Setting levels correctly at the start prevents distortion and unwanted noise further down the line. A well-designed system keeps signal flow simple and organized, which makes troubleshooting easier and improves long-term reliability.
Processing for Consistency
Subtle processing helps refine the sound without overcomplicating it.
Compression can smooth out vocal dynamics so one speaker does not overpower another. Equalization can enhance clarity or reduce harsh frequencies. The key is restraint. Natural sound always wins over excessive processing.
A clean signal path ensures your final recording sounds polished without feeling artificial.
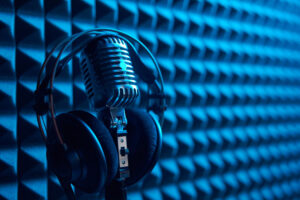
Step 3: Choose the Right Microphones
Microphone selection shapes the overall tone of your podcast.
Dynamic vs Condenser Microphones
Dynamic microphones are popular in podcast studios because they focus tightly on the speaker’s voice and reject background noise. They are especially helpful in rooms that are not fully isolated.
Condenser microphones capture more detail and nuance. In a well-treated studio, they can provide exceptional clarity. However, they are more sensitive to room reflections and ambient noise.
The best choice depends on your space, your hosts’ voices, and the type of production you are creating.
Placement Matters
Even the best microphone will underperform if it is poorly positioned. Proper distance, angle, and pop protection all contribute to consistent sound.
Matching microphones for multiple hosts can also simplify mixing and create a cohesive tone across the show.
Step 4: Design Proper Monitoring
Monitoring allows you to hear what your audience will hear. Without accurate monitoring, it is difficult to make confident decisions.
Studio Monitors
Professional nearfield monitors provide an honest representation of your audio. Consumer speakers often exaggerate bass or treble, which can lead to mixes that do not translate well to other systems.
Speaker placement is just as important as speaker quality. Monitors should be positioned symmetrically and angled toward the listening position to maintain balance.
Headphone Systems
Each host needs reliable headphone monitoring with low latency. Clear headphone feeds prevent bleeding into microphones and allow everyone to stay aware of their levels.
If you plan to bring in remote guests, a mix minus setup becomes essential. This allows guests to hear the conversation without hearing their own delayed voice. It is a small detail that makes a big difference in professionalism.
Step 5: Plan for Video Integration
Many podcasts now include video for streaming platforms and social media. If you know video will be part of your workflow, plan for it from the beginning.
Lighting should complement the space without creating noise or heat issues. Camera placement should avoid interfering with microphone positioning. Cable management should remain clean and organized.
An integrated approach prevents clutter and ensures audio quality is never compromised for visual elements.
Step 6: Think Long Term
A broadcast-quality studio should be built with growth in mind. Even if you start small, your infrastructure should support expansion.
Consider future needs such as:
- Additional microphones
- Remote recording capability
- Live streaming
- Control system upgrades
- Planning ahead saves money and reduces downtime later.
- Final Calibration and Testing
Once everything is installed, proper testing and calibration bring the studio to life.
This stage includes verifying gain structure, testing signal routing, measuring acoustic performance, and training users on daily operation. Fine tuning ensures that the studio performs consistently every time someone sits down to record.
The Value of Professional Design
It is possible to assemble a podcast setup with online tutorials and consumer equipment. It is much harder to achieve consistent, broadcast-level results without careful planning.
A well-designed podcast studio balances acoustics, equipment selection, signal flow, and monitoring into one cohesive system. Every decision supports clarity, reliability, and ease of use.
When the room is right, the signal path is clean, and the monitoring is accurate, your content becomes the focus. That is what professional studio design is all about.
For organizations that want their podcast to reflect quality and credibility, starting from the ground up with thoughtful audio system design makes all the difference. Contact Lowrance Sound Company at 731-885-4504 today to learn more about how we can help deliver professional audio design for your podcast studio.